스프링의 MVC의 기본 구조를 알아보자.
개발 환경은 스프링 STS 3.0.4버전이다.
스프링의 STS를 설치하고 샘플 프로젝트를 만들면 기본적인 샘플 소스가 생성된다.
샘플소스의 각각의 역할을 알아보자.
우선 프로젝트 구조를 다음과 같이 변경하였다.
그럼 어떻게 매핑이 되는지 알아보도록 하자.

web.xml
root-context.xml
servlet-context.xml
이것으로 기본적인 xml 설정이 끝이 났다 그러면 컨트롤러와 뷰를 매핑하는 부분을 알아보자.
MainController.java
main.jsp
이렇게 기본적인 설정이 끝났다. 실행시키면 아래와같은 화면이 나오게 된다.

이번 포스팅은 여기까지이다. 다음 포스팅은 이 기본 설정에 추가되는 방식으로 진행될 것이다.
개발 환경은 스프링 STS 3.0.4버전이다.
스프링의 STS를 설치하고 샘플 프로젝트를 만들면 기본적인 샘플 소스가 생성된다.
샘플소스의 각각의 역할을 알아보자.
우선 프로젝트 구조를 다음과 같이 변경하였다.
그럼 어떻게 매핑이 되는지 알아보도록 하자.
web.xml
<?xml version="1.0" encoding="UTF-8"?>
<web-app version="2.5" xmlns="http://java.sun.com/xml/ns/javaee"
    xmlns:xsi="http://www.w3.org/2001/XMLSchema-instance"
    xsi:schemaLocation="http://java.sun.com/xml/ns/javaee http://java.sun.com/xml/ns/javaee/web-app_2_5.xsd">

    <!-- //서버 실행시 불러올 파일들 // -->
    <context-param>
        <param-name>contextConfigLocation</param-name>
        <param-value>/WEB-INF/spring/root-context.xml</param-value>
    </context-param>

    <!-- ContextLoaderListener와 DispatcherServlet은 각각 WebApplicationContext 인스턴스를 생성하게 된다.-->

      <  ContextLoaderListener가 생성한 Context가 root가 되고 DispatcherServlet 이 생성한 인스턴스가 root context를

          부모로 사용하는 자식 Context가 된다.

          이때 자식 Context들은 root Context가 제공하는 빈을 사용할 수 있기 때문에  ContextLoaderListener를 이용하여

          공통 빈을 설정하는 것이다. >

    <listener>
        <listener-class>org.springframework.web.context.ContextLoaderListener</listener-class>
    </listener>

   url요청이 발생하면 DispatcherServlet이 처리하도록 설정

    <servlet>
        <servlet-name>appServlet</servlet-name>
        <servlet-class>org.springframework.web.servlet.DispatcherServlet</servlet-class>
        <init-param>
            <param-name>contextConfigLocation</param-name>
            <param-value>/WEB-INF/spring/servlet-context.xml</param-value>  //설정 파일이 있는 경로
        </init-param>
        <load-on-startup>1</load-on-startup>
    </servlet>

    <servlet-mapping>
        <servlet-name>appServlet</servlet-name>
        <url-pattern>/</url-pattern>  /로 설정함으로서 /이하 모든 url을 매핑시키겠단 뜻.
    </servlet-mapping>

</web-app>
root-context.xml
<?xml version="1.0" encoding="UTF-8"?>
<beans xmlns="http://www.springframework.org/schema/beans"
    xmlns:xsi="http://www.w3.org/2001/XMLSchema-instance"
    xsi:schemaLocation="http://www.springframework.org/schema/beans http://www.springframework.org/schema/beans/spring-beans.xsd">

    <!--Root Context를 설정하는 곳 공유할 부분을 설정하는 부분이다. 앞으로 공부하면서 추가하도록 하겠다. -->

</beans>
servlet-context.xml
<?xml version="1.0" encoding="UTF-8"?>
<beans:beans xmlns="http://www.springframework.org/schema/mvc"
    xmlns:xsi="http://www.w3.org/2001/XMLSchema-instance"
    xmlns:beans="http://www.springframework.org/schema/beans"
    xmlns:context="http://www.springframework.org/schema/context"
    xsi:schemaLocation="http://www.springframework.org/schema/mvc http://www.springframework.org/schema/mvc/spring-mvc.xsd
        http://www.springframework.org/schema/beans http://www.springframework.org/schema/beans/spring-beans.xsd
        http://www.springframework.org/schema/context http://www.springframework.org/schema/context/spring-context.xsd">

    <!-- DispatcherServlet Context: defines this servlet's request-processing infrastructure -->

    <!-- Enables the Spring MVC @Controller programming model -->
    <annotation-driven />

    <!-- Handles HTTP GET requests for /resources/** by efficiently serving up static resources in the ${webappRoot}/resources directory -->
    <resources mapping="/resources/**" location="/resources/" />

    <!-- Resolves views selected for rendering by @Controllers to .jsp resources in the /WEB-INF/views directory -->
    <beans:bean class="org.springframework.web.servlet.view.InternalResourceViewResolver">
        <beans:property name="prefix" value="/WEB-INF/jsp/" />   // 페이지의 기본 루트
        <beans:property name="suffix" value=".jsp" />   페이지의 기본 확장자
    </beans:bean>

    <context:component-scan base-package="com.spring.test" /> // 기본 패키지 http://localhost:9001/test/main로 요청을 할경우
                                                                 아이피/기본패키지(test)/컨트롤에 설정한 어노테이션으로 요청하게 된다.


</beans:beans>
이것으로 기본적인 xml 설정이 끝이 났다 그러면 컨트롤러와 뷰를 매핑하는 부분을 알아보자.
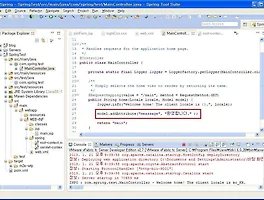
MainController.java
package com.spring.test; import java.util.Locale; import org.slf4j.Logger; import org.slf4j.LoggerFactory; import org.springframework.stereotype.Controller; import org.springframework.ui.Model; import org.springframework.web.bind.annotation.RequestMapping; import org.springframework.web.bind.annotation.RequestMethod; /** * Handles requests for the application home page. */ @Controller //컨트롤러 어노테이션 public class MainController { private static final Logger logger = LoggerFactory.getLogger(MainController.class); /** * Simply selects the home view to render by returning its name. */ @RequestMapping(value = "/main", method = RequestMethod.GET) //어노테이션 설정 /main으로 url요청이 들어오면 이 컨트롤러로 매핑하겠단 뜻. public String home(Locale locale, Model model) { //컨트롤러는 직접 또는 간접적으로 ModelAndView 객체를 생성하게 된다. 페이지와 매핑된다. logger.info("Welcome home! The client locale is {}.", locale); model.addAttribute("meassage", "Hello~~" ); // jsp페이지로 넘길 attribute를 설정 return "main"; //위에서 설정한 페이지 루트의 페이지명 main.jsp와 매핑이 된다. 만약 jsp밑에 login이란 디렉토리를 만들고 그 안에이와 같이 설정하면 최종적으로 main.jsp 가 호출되어 컨테이너에 의해 클라이언트로 전송되게 된다.
// main.jsp가 있다면 login/main 이라고 설정하면 된다 } }
main.jsp
<%@ taglib uri="http://java.sun.com/jsp/jstl/core" prefix="c" %>
<%@ page session="false" %>
<html>
<head>
    <title>Home</title>
</head>
<body>
<h1>
    ${meassage } // 컨트롤러에서 설정한 Attribute
</h1>
</body>
</html>
이렇게 기본적인 설정이 끝났다. 실행시키면 아래와같은 화면이 나오게 된다.
이번 포스팅은 여기까지이다. 다음 포스팅은 이 기본 설정에 추가되는 방식으로 진행될 것이다.
'Programming > 과거포스팅' 카테고리의 다른 글
| Spring MVC(3) Mybatis 연동 (12) | 2013.01.24 |
|---|---|
| Spring MVC(2) CharacterEncodingFilter (2) | 2013.01.21 |
| javascript 를 이용한 반투명 레이어 처리 (0) | 2013.01.20 |
| Maven을 이용한 이클립스 스프링MVC 개발환경 셋팅 (4) | 2013.01.13 |
| WebView의 화면 전환 처리 (2) | 2012.12.23 |